A Complete Guide To The Ninja Build System

Many large projects (such as PyTorch) use
ninja as part of their build system. To read and understand these large projects, it is necessary to have a preliminary understanding of ninja.A Brief Introduction to Ninja
ninja is a build tool used to call various tools (code generators, compilers, linkers, etc.) to compile large projects. Unlike tools like
cmake/make, ninja was designed from the start not for writing by humans, but as a target generated by other programs.The design philosophy of
ninja is to avoid any ambiguity. For example, in makefiles, you might often use dir/*.cpp to represent source files, but this requires querying the file system to get the specific content, which is a slow and uncertain operation. ninja hands over these ambiguous operations to the meta-build system (like cmake), leaving only the actual compilation commands.Essentially,
ninja lists the specific commands to be executed and then executes them.ninja analyzes the dependencies between these series of commands and implements two important features based on this relationship:- Parallel compilation: Commands without dependencies can be executed in parallel.
ninjauses the number of CPUs by default for parallelization, and generally, there is no need to manually set the number of parallel processes, unless you want to limit the number of CPUs used byninja(for example, if there are other tasks running and you only wantninjato use half of the CPUs). - Incremental compilation: Based on the analysis of file timestamps, if the timestamp of a file changes, then the commands that depend on this file and other commands that depend on these commands will be re-executed, to achieve the effect of incremental compilation (such as recompiling after modifying a file).
Installation Methods for Ninja
ninja is a tool, and it is very small. There are installation methods for various systems, specifically refer to the documentation. In general, there are three installation methods:- System-level installation: For example,
apt-get install ninja-buildon Ubuntu,brew install ninjaon MacOS, after installationninjabecomes a system command, similar to commands likels/cat. - User-level installation: You can install
ninjathroughpiporconda:conda install ninja/pip install ninja. - Custom installation: Download the installation package from the GitHub download page and unzip it, or download the source code and compile it yourself.
ninja is a very small tool. From the download page below, you can see that the entire tool's compressed package is only a few hundred KB.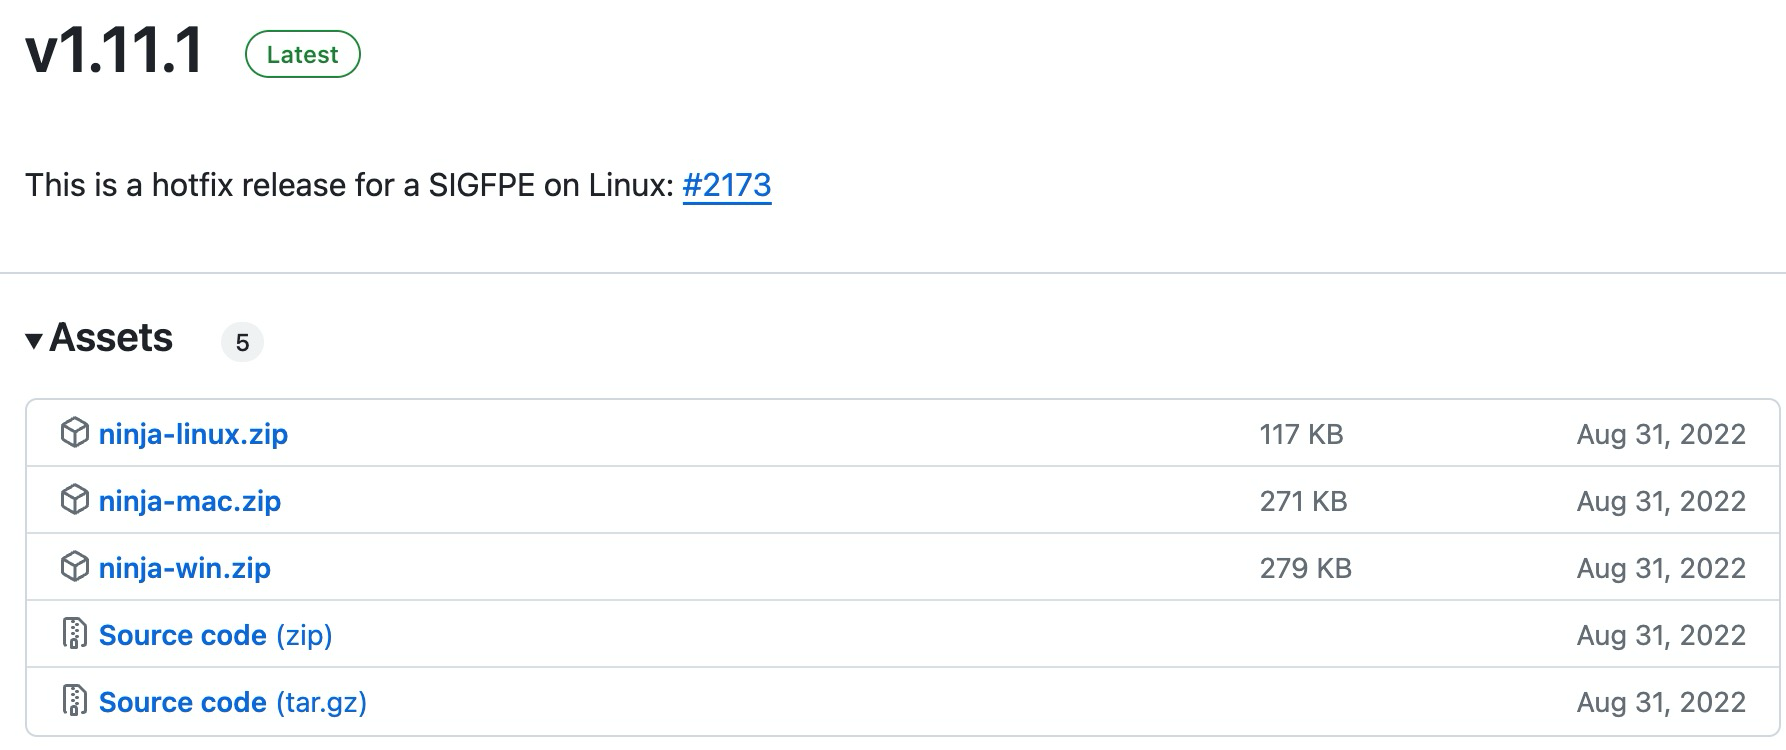
In fact, the official only releases new versions through GitHub. Other installation methods are managed by the community. For example,
pip install ninja installs the package maintained by the scikit-build community at https://github.com/scikit-build/ninja-python-distributions. They packaged ninja into a pip package. Many people don't know they are downloading the non-official ninja, this GitHub project only has 46 stars but has been downloaded two and a half million times. conda install ninja is a similar thing.In summary, if you need to ensure security, you can download it from the
ninja GitHub release page; if you want convenience, you can use various community-maintained installation methods.Understanding Ninja Files
The build configuration file for
ninja is generally called build.ninja. Although we generally do not write it, we need to roughly understand it to debug or understand the build process.Below is a simple example to illustrate the common configuration of
ninja:There are two header files
a1.h and a2.h, each defining a variable a, but with different values:// a1.h
int a = 1;
// a2.h
int a = 2;
A source file
a.cpp includes one of these two files depending on the macro:// a.cpp
#include<iostream>
using namespace ::std;
#ifdef USE_A1
#include "a1.h"
#endif
#ifdef USE_A2
#include "a2.h"
#endif
int main()
{
cout << "hello, world from " << a << "!\n";
}
A
build.ninja file contains the ninja build configuration (note the final newline, which is necessary):# build.ninja
cxxflags = -DUSE_A1
rule compile
description = compile with $cxxflags
command = g++ -MM -MF $out.d -MT $out $cxxflags $in && g++ $cxxflags $in -o $out
depfile = $out.d
build compile_with_default_cxxflags: compile a.cpp
build compile_with_shadow_cxxflags: compile a.cpp
cxxflags = -DUSE_A2
default compile_with_default_cxxflags
This configuration contains the following common content:
- Comments (
#), lines starting with#inbuild.ninjarepresent comments. - Variables,
cxxflags = -DUSE_A1defines a variablecxxflagswith the value-DUSE_A1. This variable's value can be used later in the code, referenced as$cxxflags. Specifically,-DUSE_A1is to define a macro namedUSE_A1before compilation. - Rules, syntax is
rulefollowed by the rule name. Here we defined a rule namedcompile. The rule contains default variables$inand$out, where$inrepresents the list of input files and$outrepresents the output file name. - Rule
description, used during the compilation process to display and tell the user what is currently being done. - Specific commands of the rule (
command), detailing the specific compilation command. - Dependency file of the rule (
depfile), used for incremental compilation, as explained later. - Build, syntax is
buildfollowed by the file name to be built, a colon:, and the rule name and list of input files. Essentiallybuild $out: $rule $inis to pass$inand$outto$ruleand then run itscommand. - Local variables in a build, any variable under
buildin this build command overrides the global variable. Specifically,cxxflagsdefined inbuild compile_with_shadow_cxxflagswill override thecxxflagsused in thiscompilecommand. - Default build targets (
default). There can be multipledefaultlines, and the final default build target is the union of them. If there are nodefaults, the default build is all thebuildentries.
With this
build.ninja, we can use ninja or ninja compile_with_default_cxxflags to build the default code and get the executable file compile_with_default_cxxflags (which outputs hello, world from 1! when executed); we can also use ninja compile_with_shadow_cxxflags to get the executable file compile_with_shadow_cxxflags (which outputs hello, world from 2! when executed). We can also modify a1.h or a2.h and observe whether ninja will recompile.Understanding Ninja's Incremental Compilation
Most of the content in this
build.ninja is straightforward, the only difficult part is depfile = $out.d used for incremental compilation.First,
$out is a default variable of ninja, representing the target file name. So $out.d is the target file name plus .d. For example, in build compile_with_default_cxxflags, depfile is compile_with_default_cxxflags.d.Then we need to understand the goal of incremental build: in our
build compile_with_default_cxxflags entry, only a.cpp is passed in, but in fact, our code includes a1.h or a2.h. How can we let ninja know that it needs to check a1.h or a2.h for incremental builds? This requires compiler support: the g++ -MM -MF $out.d parameter outputs the dependencies of the file and header files to $out.d, and next time ninja will use the contents of this file to decide the specific files to check for changes.For example, the content of
compile_with_default_cxxflags.d is as follows:compile_with_default_cxxflags: a.cpp a1.h
The next time
ninja builds compile_with_default_cxxflags, it will check this file and then look at the modification time of a.cpp and a1.h. If any of the files have been modified, it will recompile. Also, if the compile_with_default_cxxflags file is missing, ninja will recompile (this is easy to understand).Advanced Usage of Ninja
Many
ninja.build files contain a phony rule. This is a built-in rule, meaning "fake", a rule without an actual rule. We can understand it as:rule phony
command = : $in $out
The colon
: is a command in Unix systems that always exits normally regardless of the parameters. Therefore, the phony rule doesn't do much, but establishes a dependency relationship between input and output.The command
ninja without parameters will build the default build target in the file. We can also manually build a target with ninja compile_with_shadow_cxxflags.When building multiple targets (for example, PyTorch has thousands of targets),
ninja will display a progress bar. The content shown on the progress bar is the content of the description field under rule.Advanced usage of
ninja is generally under ninja -t, for example, ninja -t clean can clean all generated files, ninja -t browse can open a web browser to view the dependency graph of files (the default view is the all dependency graph):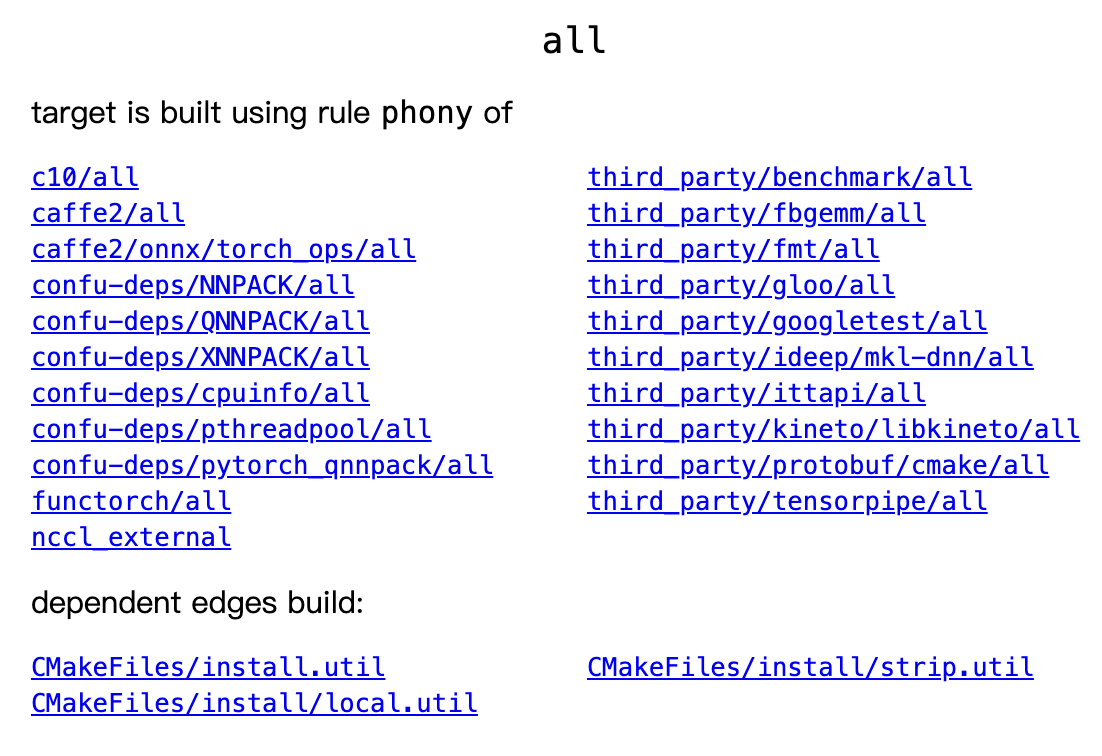
Through this browser interface, we can easily see which files depend on which files. Opening
http://localhost:8000/?libtorch.so you can see the complete dependencies of libtorch.so, no need to guess based on CMakeLists.txt anymore. (You can also export the dependency graph directly as a dot graph file with ninja -t graph, but the dependency graph of large projects is generally very complex and inconvenient to look at.)Finally,
ninja -t targets all gives all the build targets, which can be used to search for the content you want with grep; ninja -C /path/to/dir -f /path/to/file allows ninja to switch to /path/to/dir to execute commands and read the configuration file from /path/to/file. The default parameter for -f is build.ninja, and for -C it is ., which is the current path. Generally, the -f parameter is rarely used, and the -C parameter is used more often.Conclusion
This article briefly introduces some principles and uses of
ninja. Although simple, the title of the article is "A Complete Guide To The Ninja Build System", because ninja is really small (take a look at its entire documentation) and this article covers almost all the content that is worth our attention.